Chord charts are diagrams of the fretboard. They show the names of the chords and where they are played on the fretboard. Chord charts can be used to help you learn how to play guitar or to accompany a song. There are many different chord chart formats, but all follow the same basic pattern In this article, we will talk about chords or more precisely, about a chord chart. What is a chord chart and how can we decipher a chord and place it on the guitar?
What is a Chord Chart
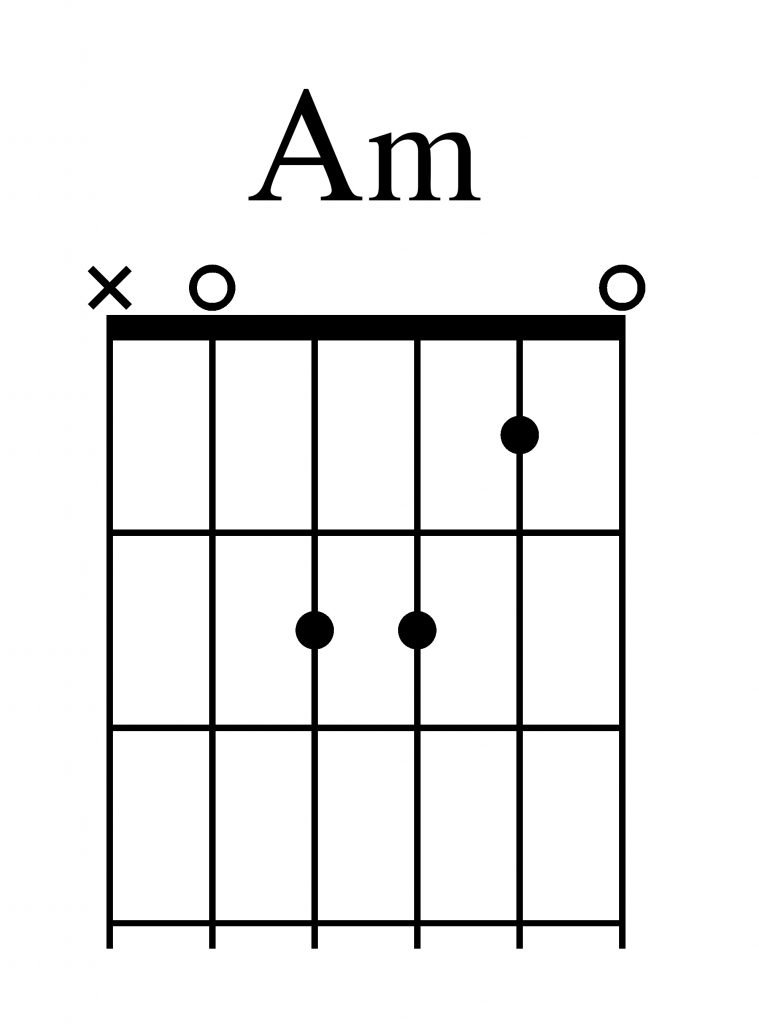
The chord chart is a graphical representation of the guitar fretboard with the strings, nut (upper bridge), and frets. It indicates the places that the left-hand fingers should press. For example, here (fig.1) is a chord chart of chord A minor.
I like to give this example. Imagine someone holding a guitar in front of you, (fig. 2)
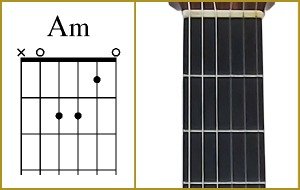
The part of the fretboard that you see above, is what the chord chart represents. On your right is the first string of the guitar and from there: second, third, fourth, fifth, and sixth. From top to bottom are the first fret, the second, and the third. The black dots are the places where you should put your left-hand fingers. Basically, this is what the chart represents graphically. The upper thick line depicts the nut of the guitar. The next horizontal lines are the frets. There are a few more small details that we will reveal later.
How to read the chord chart
All vertical lines, as we said, are strings from right to left: first, second, third, fourth, fifth, and sixth. Above the thick line, ie above the upper bridge, are usually the strings that should not be pressed and the strings that are free, ie that should not be pressed. If there is a zero above the given string, means that we do not put any left-hand finger on that string. In this case, we have a zero above the first string, we just let it sound open. If there is an “x” above the string, it means that this string should not be played at all, it should not sound when we play the chord.
Chord chart reading the chord’s name
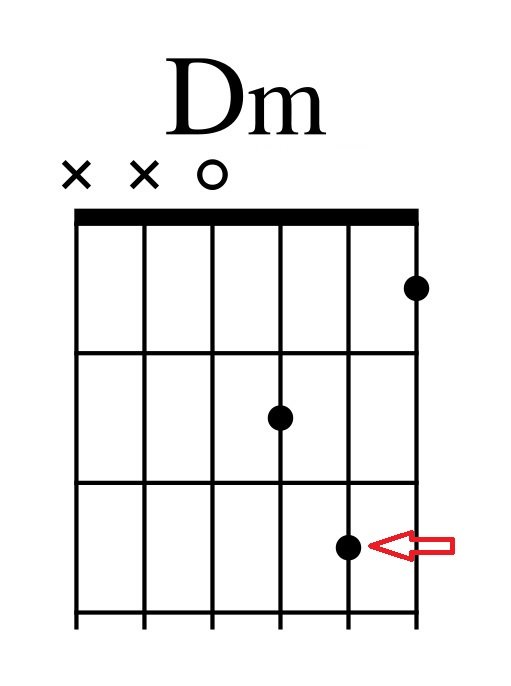
We use Latin laters to write the chords. If the letter is capital, let’s say: “F” it means that the chord is major and we say: “F major”. If after the capital letter there is a lowercase letter “m”, for example, “Dm” it means that the chord is minor. We say “D minor”, as in fig.3. If there is a number after the chord, like this: “E7” – We say first the chord name then, major or minor, and at the end the number. In this case,-“E major seven”. That’s good to know. Wherever you have to play chords, you will see them written that way. With Latin letters, so it’s good to learn what they mean so you can communicate with your colleagues.
Back to how to read the chart.
Let’s take for example D minor chord fig.3
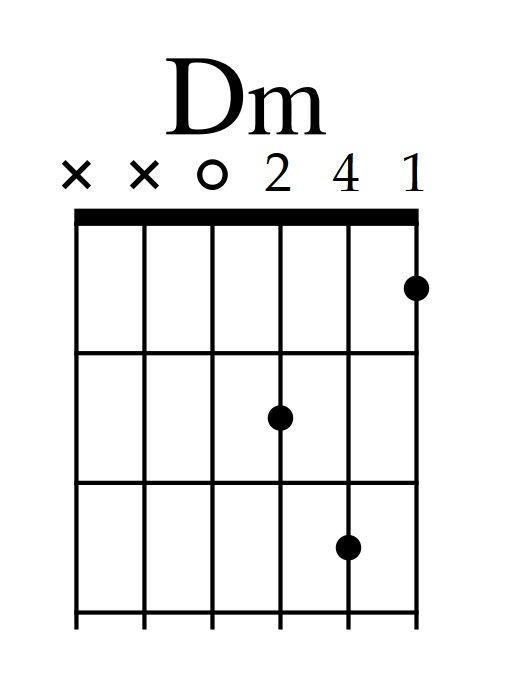
So, on the first string first fret we have to put the first finger. look over it, here is number 1, which is the left-hand finger number. That is how most of the textbooks represent the chords. Otherwise, in the guitar literature, you will see them without those numbers above the strings.
Download Chord Exercises Free eBook
Next is the second string, we have to press on the third fret with the fourth finger. This is how the chord is given. Then the third string on the second fret with the second finger. Above the fourth string, you can see we have zero which means that this string will be open. We will play it, but we will not press it. The fifth and sixth strings have “x” es above them. This means that we should not play them at all. They don’t have to sound in this chord. That is the D minor chord.
Chord Charts in Songs
In the literature, you will see the chords, not only in letters but also with diagrams below them, as in the example below:
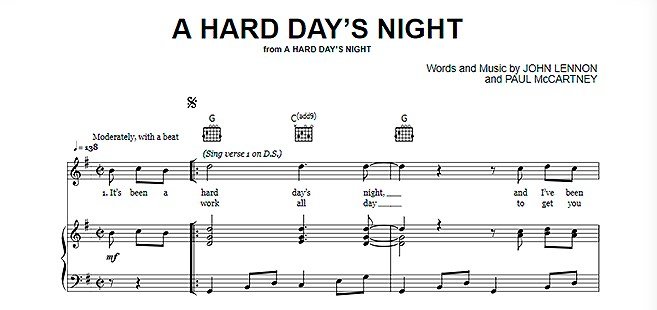
Usually, the fingers of the left hand are not written, ie with which finger the guitarist has to press the certain string on the certain threshold. He, the player decides what to do. For example the same chord – D minor. He could easily play as in fig. 4
first string, with the first finger on the first fret. Second-string, with the third finger on the third fret, not the fourth finger as given in fig. 3. The rest is the same. If these fingers are not given, and in most cases, as we said, they are not given, then it is your decision and choice of which finger to use and where.
Chord Chart finger placing
There is one small feature that I want to emphasize, for example, in the chord “A minor”, there will be no fingers.
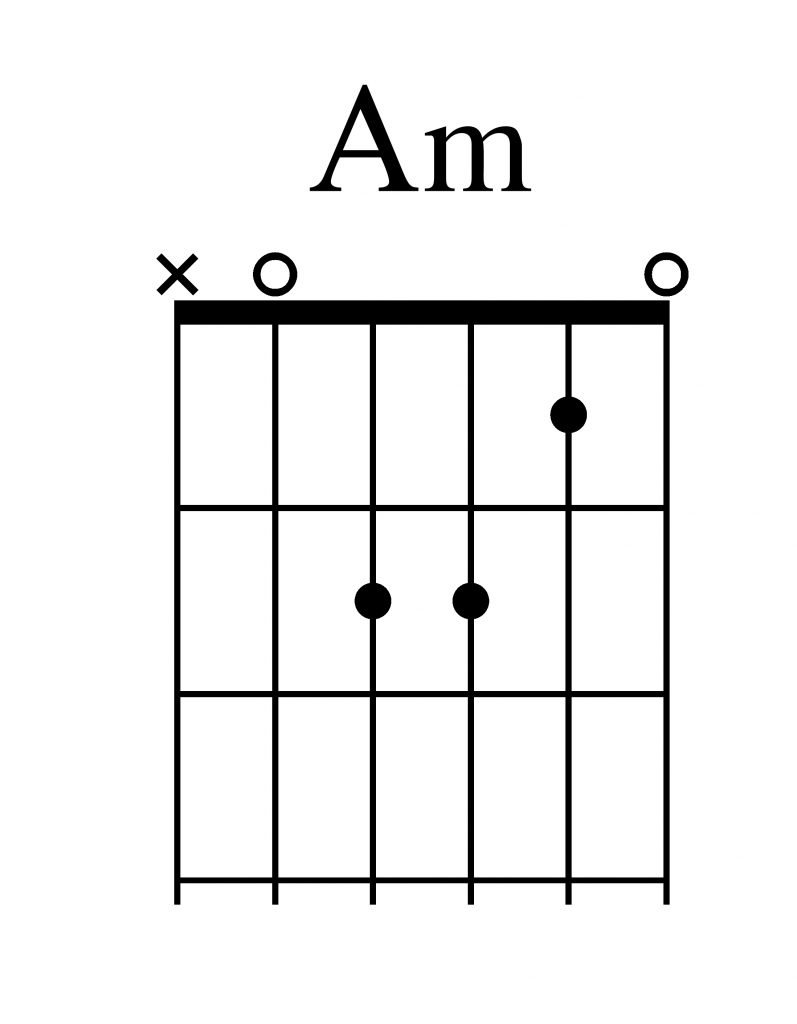
The first string is zero, we leave it as it is, we press the second string on the first fret, the third string on the second fret, and the fourth string on the second fret. We will have two fingers on the same fret on different strings. As a beginner guitarist, you can do something like that. For example, to press with the second finger on the third string and with the third finger on the fourth string on the same fret, to twist those two fingers somehow. (fig.6)

There are people who play chords in this way. Maybe that’s how they have learned to play at the beginning. Try out and you will see that it is not very convenient. Most people would do the following (fig.7)
However, those things are not concrete. In most cases when we press adjacent strings on the same fret, or not only adjacent ones, we place the left finger on top and the right finger on the bottom.
In General, this cannot be used as a rule
that applies always. It can happen in some situations, and it happens very often. But it depends on what will happen next, what happened before, and so on. But when we talk about just performing chords, accompanying popular songs, and so on. I advise you: just use this method, that is, when you put two fingers vertically, put your left finger on top. Again, it is not impossible to play as in (fig.6) many people do it, but somehow it is not convenient, it is not anatomical to say so.
Barre chords
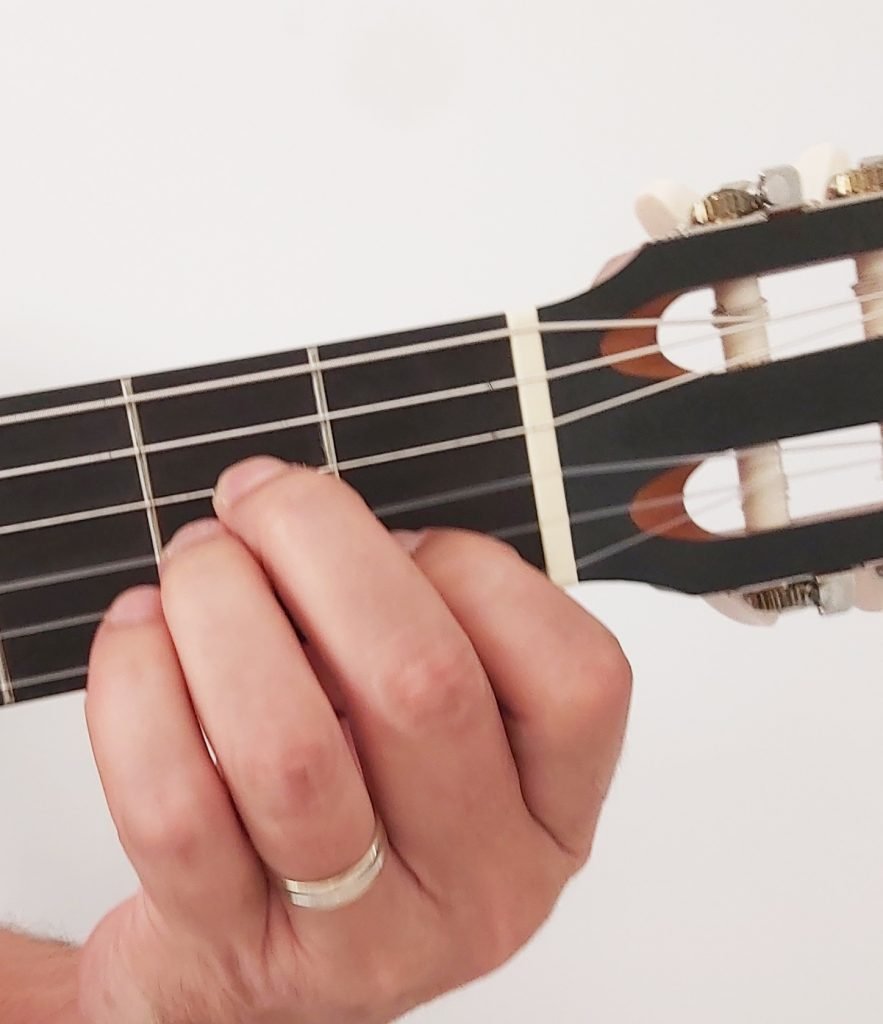
Let’s move on. Have a look at the F major chord. fig.8 – the first string and the second string are both on the first fret. We press those strings with two of our left-hand fingers. Then we have three more notes to press, What happens here? We need to press five notes but we have only four fingers. In this case, we use the so-called barre technique.
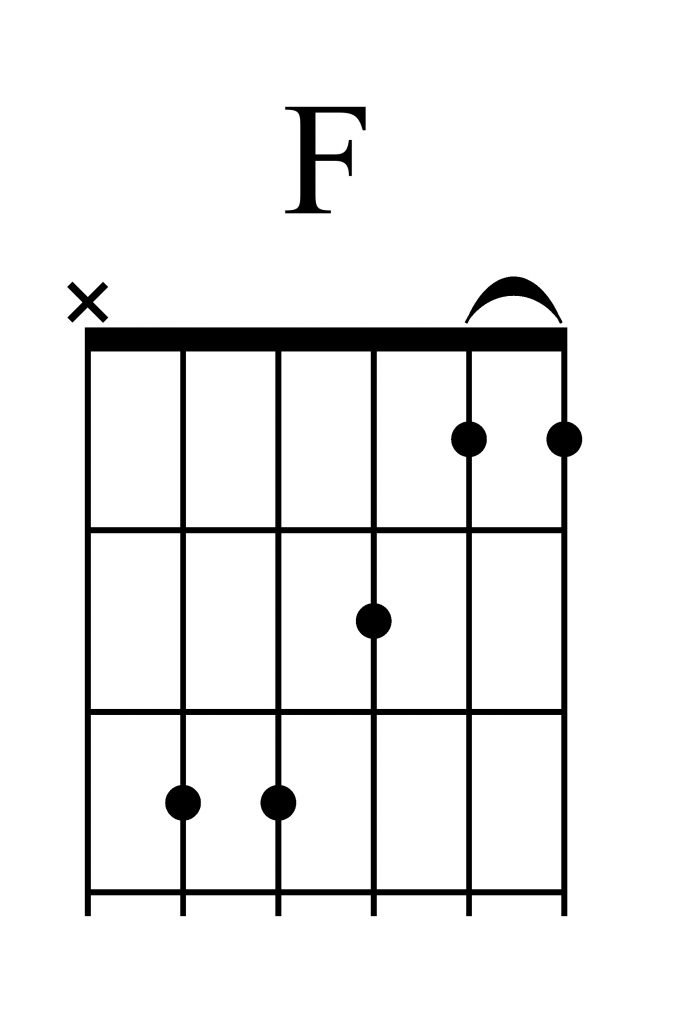
The barre is a technique, in which one finger presses more than one string. In this way, we are left with three free fingers with which we will press the other three notes. On the third string, the second fret with the second finger. We will put the fourth finger on the fourth string third fret, to release the third finger, which will press the fifth string third fret. How are we going to sound it, with a guitar pick or with fingers, right hand is not a subject here. We are currently talking about the left hand, How to read the chord chart.
You see an arc-shaped line that is above the first and second strings. That is how we indicate barre in the chord chart. We press two notes with one finger. In this case, it will be the first finger. we can’t do it with the fourth because … we will live the other fingers out of the range. The sixth string in this chord has an “x”, which means, we don’t play it, … it doesn’t sound. This is for a little bar.
Check this video lesson to learn more about bare
Big Bare
Here is another “F major” chord, (fig.9)in which finger one has to press all the strings. Means, it has to cover all six strings.
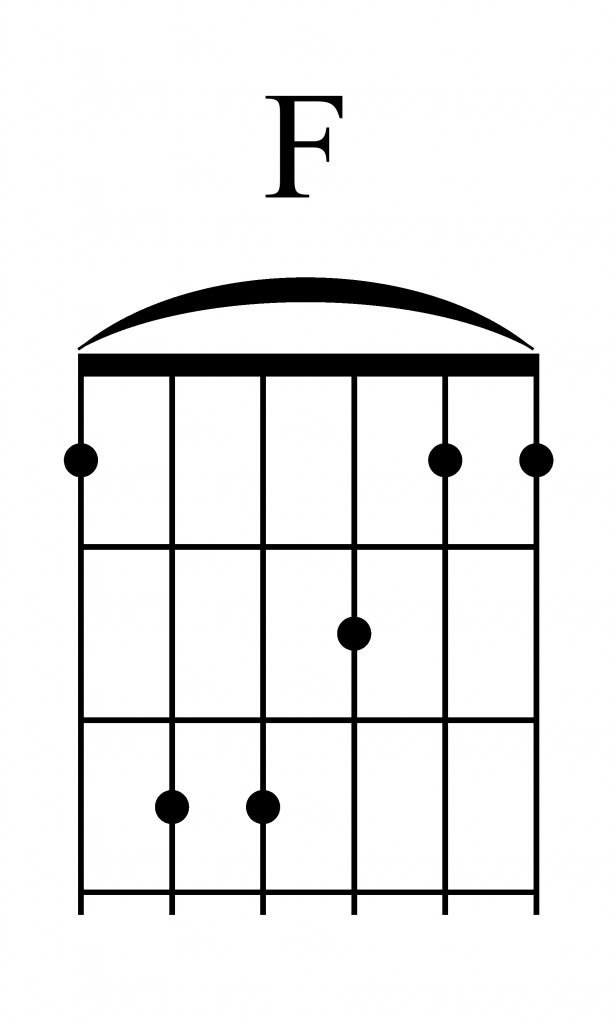
The arched line is above all the strings. We put the first finger on each string on the first fret, and we work. This is “F major”. We press the other three notes with the second, fourth, and third fingers. On the corresponding strings and frets, as in the other form of “F major”.
Chord Exercises Free Step by Step Guide
You want to learn guitar chords but don’t know where to start! Well, now that you have an idea of how to read chord charts, you might be thinking of trying to play some of your favorite songs. That is great! But before that, you will need to learn some chords. Learning chords just by themselves is as if you try to learn a dictionary. You agree it will not be very productive.
We’ve got your back with those FREE step-by-step chord exercises!
Those exercises will teach you how to play chords in a relevantly short time! They are built and arranged in a way that allows you to progress steadily and gradually. These exercises provide you with building blocks that you can use straight away in your songs!
Download your free Step by Step Chord Exercises now and get started with your journey in the guitar world!
